
19c Grid Installation Standalone on Linux 7
In this post I am going to share how to install 19c Grid on Linux 7. You can use VNC for GUI installation or Direct on Linux Server GUI.
Steps:
1) Download the 19c Grid software

2) Create user oraasm for grid home. dba group was already present on my server. If it is not present, please create it.
useradd -g dba -c "ASM user" -d /home/oraasm -s /bin/bash oraasm
useradd -g oinstall -c "ASM user" -d /home/oraasm -s /bin/bash oraasm
uid=54323(oraasm) gid=54322(dba) groups=54322(dba),54321(oinstall)
3) I will create disk for ASM but not using oracleasm utility but using udev.
I have attached a 120 GB fixed disk on my Virtual Box and setup udev to mark it for ASM.
4) Verify the disk now.
[root@funebs122 rules.d]# ls -ltr /dev/ora*
lrwxrwxrwx. 1 root root 3 Feb 15 18:53 /dev/oraasm01 -> sdc
5) Make a directory Structure or mount point for grid installation
Connect as oraasm (My Grid OS user which will be used for installation)
[oraasm@funebs122 oraapps122]$ mkdir -p /oraapps122/GRID19c
6) Copy the grid software zip file on the path.
[oraasm@funebs122 GRID19c]$ cp /tmp/LINUX.X64_193000_grid_home.zip /oraapps122/GRID19c/
7) Install pre-req for 19c on server from root user
yum search preinstall
yum install oracle-database-preinstall-19c.x86_64 -y
8) Unzip the grid software and remove the zip file then
[oraasm@funebs122 GRID19c]$ cd /oraapps122/GRID19c
[oraasm@funebs122 GRID19c]$ unzip LINUX.X64_193000_grid_home.zip

9) Install the cvu disk package from the unzip grid software from root user
rpm -ivh /oraapps122/GRID19c/cv/rpm/cvuqdisk-1.0.10-1.rpm
Preparing... ################################# [100%]
Updating / installing...
1:cvuqdisk-1.0.10-1 ################################# [100%]
10) Launch the grid installer (gridSetup.sh) from oraasm user
/oraapps122/GRID19c/gridSetup.sh

Click Next
Give DISK group name as EBS_DATA
Set Redundancy as external
Set the Discovery path as /dev/ora*


Click Next

Click Yes and Continue


No Action required , click next

Click Next
For below warning click Yes

Click the path where to create the GRID Base

Click Next

I will take a backup of my inventory as other oracle products are also installed. If you are doing new, this will not occur.
[root@funebs122 oracle]# pwd
/oraapps122/oracle
[root@funebs122 oracle]# cp -r oraInventory oraInventory_bkp
chmod -R 777 oraInventory
Click OK and Continue.

Click Next

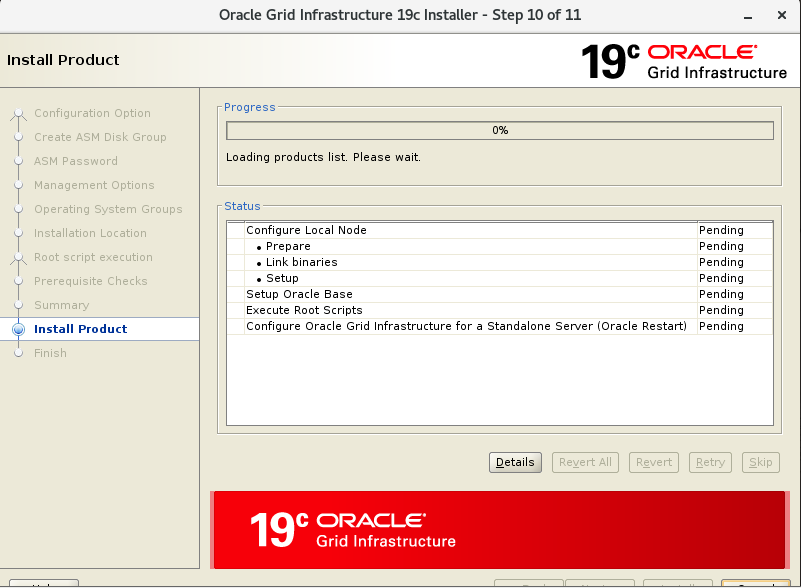
Install Summary.

Click Install
Run Below script as root.

[root@funebs122 oracle]# /oraapps122/GRID19c/root.sh
Performing root user operation.
The following environment variables are set as:
ORACLE_OWNER= oraasm
ORACLE_HOME= /oraapps122/GRID19c
Enter the full pathname of the local bin directory: [/usr/local/bin]:
Copying dbhome to /usr/local/bin ...
Copying oraenv to /usr/local/bin ...
Copying coraenv to /usr/local/bin ...
Creating /etc/oratab file...
Entries will be added to the /etc/oratab file as needed by
Database Configuration Assistant when a database is created
Finished running generic part of root script.
Now product-specific root actions will be performed.
Using configuration parameter file: /oraapps122/GRID19c/crs/install/crsconfig_params
The log of current session can be found at:
/oraapps122/app/ASM19c/crsdata/funebs122/crsconfig/roothas_2022-02-15_09-32-52PM.log
LOCAL ADD MODE
Creating OCR keys for user 'oraasm', privgrp 'dba'..
Operation successful.
LOCAL ONLY MODE
Successfully accumulated necessary OCR keys.
Creating OCR keys for user 'root', privgrp 'root'..
Operation successful.
CRS-4664: Node funebs122 successfully pinned.
2022/02/15 21:33:41 CLSRSC-330: Adding Clusterware entries to file 'oracle-ohasd.service'
funebs122 2022/02/15 21:36:06 /oraapps122/app/ASM19c/crsdata/funebs122/olr/backup_20220215_213606.olr 724960844
2022/02/15 21:36:12 CLSRSC-327: Successfully configured Oracle Restart for a standalone server
Once root.sh is done ,click ok to completed the installation.

Installation Successfull
11) Login to oraasm and validate
[oraasm@funebs122 ~]$ . oraenv
ORACLE_SID = [oraasm] ? +ASM
The Oracle base has been set to /oraapps122/app/ASM19c
[oraasm@funebs122 ~]$ echo $ORACLE_HOME
/oraapps122/GRID19c
[oraasm@funebs122 ~]$ crsctl stat res -t
--------------------------------------------------------------------------------
Name Target State Server State details
--------------------------------------------------------------------------------
Local Resources
--------------------------------------------------------------------------------
ora.EBS_DATA.dg
ONLINE ONLINE funebs122 STABLE
ora.LISTENER.lsnr
ONLINE ONLINE funebs122 STABLE
ora.asm
ONLINE ONLINE funebs122 Started,STABLE
ora.ons
OFFLINE OFFLINE funebs122 STABLE
--------------------------------------------------------------------------------
Cluster Resources
--------------------------------------------------------------------------------
ora.cssd
1 ONLINE ONLINE funebs122 STABLE
ora.diskmon
1 OFFLINE OFFLINE STABLE
ora.evmd
1 ONLINE ONLINE funebs122 STABLE
--------------------------------------------------------------------------------
[oraasm@funebs122 ~]$ asmcmd
ASMCMD> lsdg
State Type Rebal Sector Logical_Sector Block AU Total_MB Free_MB Req_mir_free_MB Usable_file_MB Offline_disks Voting_files Name
MOUNTED EXTERN N 512 512 4096 4194304 122880 122780 0 122780 0 N EBS_DATA/

Post a Comment
Post a Comment