
How to Deploy Oracle E-Business Suite Cloud Manager for Demo and Test Purposes on OCI
This simplified procedure is most appropriate for demo purposes, as it has the following restrictions:
- The automation deploys a new VCN and subnets for Oracle E-Business Suite Cloud Manager, load balancers, and the first set of Oracle E-Business Suite environments. The subnets are public regional subnets.
- The automation creates a new compartment for all the assets. An existing compartment cannot be used, and multiple compartments are not supported.
As the tenancy administrator, log in to the Oracle Cloud Infrastructure console.
Open the navigation menu and select Identity & Security. Under Identity, click Federation.
Click the OracleIdentityCloudService link to bring up the Identity Provider Details page, and then click the link in the Oracle Identity Cloud Service Console field to bring up the Identity Cloud Service console.
From the Oracle Identity Cloud Service console, create your Oracle E-Business Suite Cloud Manager group:
Using the navigation menu on the top left corner of your screen, click Groups.
Click Add.
In the Add Group dialog box under Step 1: Group Details, enter the following information:
Name: Enter the group name. For example,
funebscm-grp.Description: Enter a description of your choice.

Click Finish.
While still in the Oracle Identity Cloud Service console, create your Oracle E-Business Suite Cloud Manager administrator user.
Using the navigation menu on the top left corner of your screen, click Users.
Click Add.
In the Add User dialog box under Step 1: Add User Details, enter the following information:
First Name: Enter the first name of the new user.
Last Name: Enter the last name of the new user.
User Name: Enter the user name. funebsadmin
Email: Enter the email of the new user.
Deselect the Use email address as the user name check box.
Click Next.

In the Step 2: Assign User to Groups dialog window, select the check box for the group you just created, such as funebscm-grp.
Click Finish.

While still in the Oracle Identity Cloud Service console, give the new user the Administrator role.
Using the navigation menu on the top left corner of your screen, click Security, then Administrators.
On the Administrators page, expand the Application Administrator section and click Add.
In the Add Users to the Administrator Role dialog box, select the check box for the user corresponding to the newly created user in step 5. In this example, that would be
funebsadmin.
Click OK.
Log out of the Oracle Identity Cloud Service console by clicking on your user avatar icon, labeled with your name, and then clicking Sign Out.


Register Oracle E-Business Suite Cloud Manager as a confidential application.
Open the Welcome email that was received in the previous section.
Click Activate Your Account in the email.
Enter a new password(Sample: OracL3#C01#d), confirm, and click Submit.
Click OK to continue, which will take you to the Oracle Identity Cloud Service Login screen.
Enter the Oracle E-Business Suite Cloud Manager user name.

Click your user avatar icon, labeled with your name, in the top right corner. This displays a drop-down menu.
Select Admin Console. This displays the Oracle Identity Cloud Service Administration Console.
In the Applications tile, click the icon to Add an Application.

Select Confidential Application to go to the Add Confidential Application page.
On the Details screen, enter the following:
Name: Enter as required.
Description: Enter a description.

Click Next.
On the Client screen:
Select Configure this application as a client now.
Under Allowed Grant Types, select the following check boxes:
Resource Owner
Client Credentials
Refresh Token
Authorization Code
Additionally, if you plan to create standby environments or to upgrade environments from Oracle E-Business Suite Release 12.1 to Release 12.2, select the Resource Owner option.
Redirect URL:
https://<Cloud-Manager-web-entry>:443/cm/auth/callback, where<Cloud-Manager-web-entry>is the name you plan to associate with your load balancer IP address. For example,funebscm.training.Logout URL: Leave this field empty.
Post-Logout Redirect URL:
https://<Cloud-Manager-web-entry>:443/cm/ui/index.html?root=login, where<Cloud-Manager-web-entry>is the name you plan to associate with your load balancer IP address. For example, funebscm.training.Select the Introspect option for Allowed Operations.

Under Grant the client access to Identity Cloud Service Admin APIs:
Click Add.
Select Authenticator Client and Me in the pop-up window.
Click Add again.

Click Next.
On the Resources screen, click Next.
On the Web Tier Policy screen, click Next.
On the Authorization screen, click Finish.
Make note of the following values which will be used later:
Client ID: e2bedd76eaaa4ca68ebeadf9e36f7f9d
Client Secret: 49230c37-3a35-4210-8d3a-aa0111d95706
IDCS Client Tenant: idcs-d90122eecedc41c6b7ebb166218edfcc
Click Close.
Click Activate to activate the Confidential Application.

Click on the user avatar icon, labeled with your name.
Select the About option.
Make a note of the Instance GUID. Your Oracle Identity Cloud Service Client Tenant begins with the characters idcs- and then is followed by a string of numbers and letters. For example, idcs-d90122eecedc41c6b7ebb166218edfcc


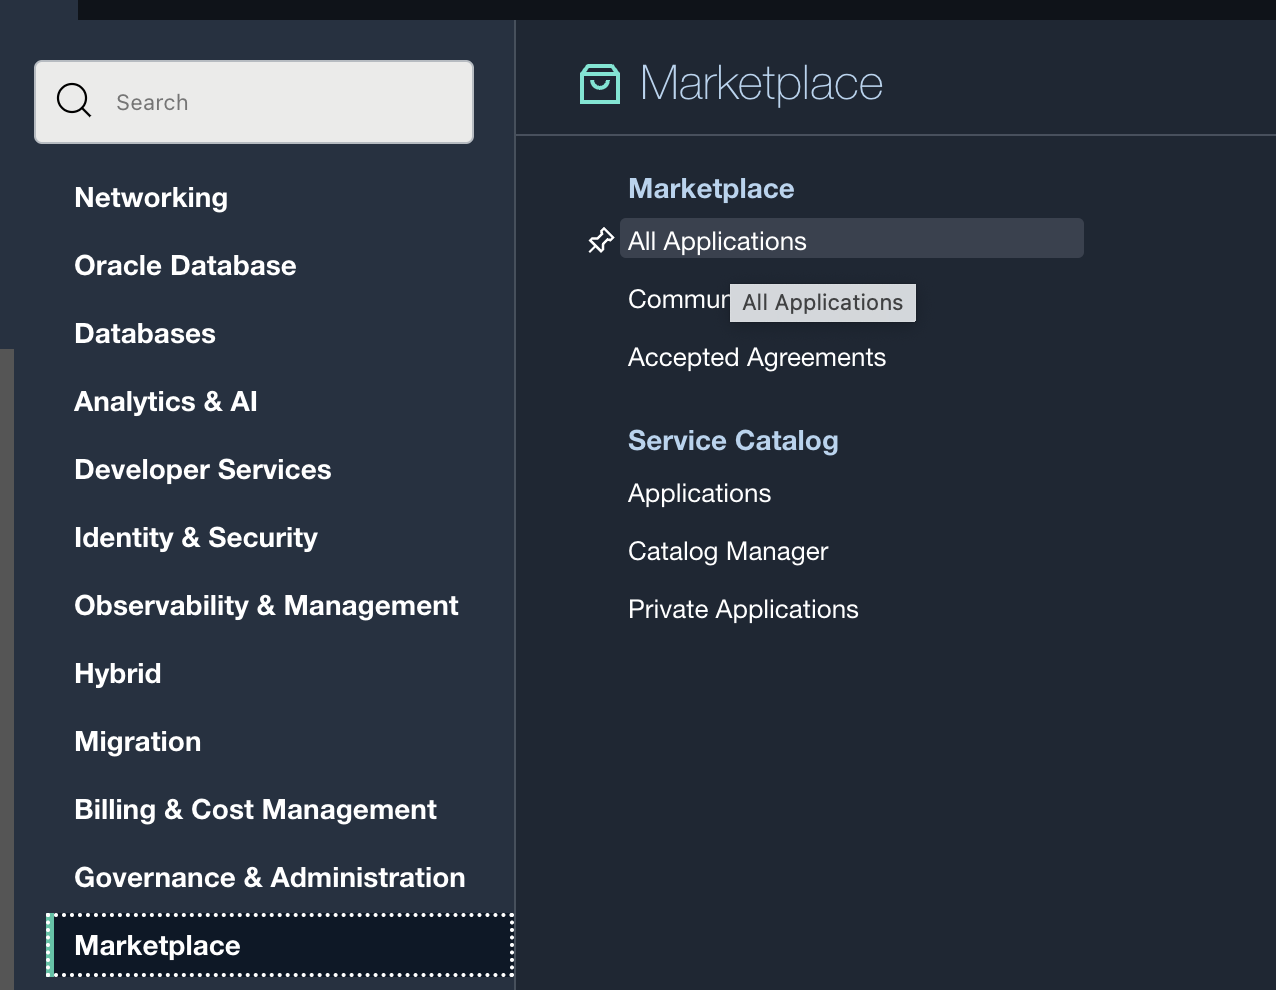
Click Marketplace and then All Applications.

In the Search field, search for
Oracle E-Business Suite Cloud Manager Stack for Demosand then click the Oracle E-Business Suite Cloud Manager Stack for Demos listing.In the Version drop-down list, ensure that the default is selected. Make sure to select the latest version.
In the Compartment drop-down list, select the parent compartment of the compartment where the Oracle E-Business Suite Cloud Manager Compute instance will be deployed. For example, funoracleappsportal(root).

Review and accept the Oracle standard Terms and Restrictions.
Click Launch Stack.

On the Configure Variables screen, enter the following values:
Under Setup Details:
Resource Prefix: A prefix that will be added to names of all the cloud resources created by the stack.
Leave the Single Compartment Setup check box selected.
Select the compartment under which the new compartment will be created.

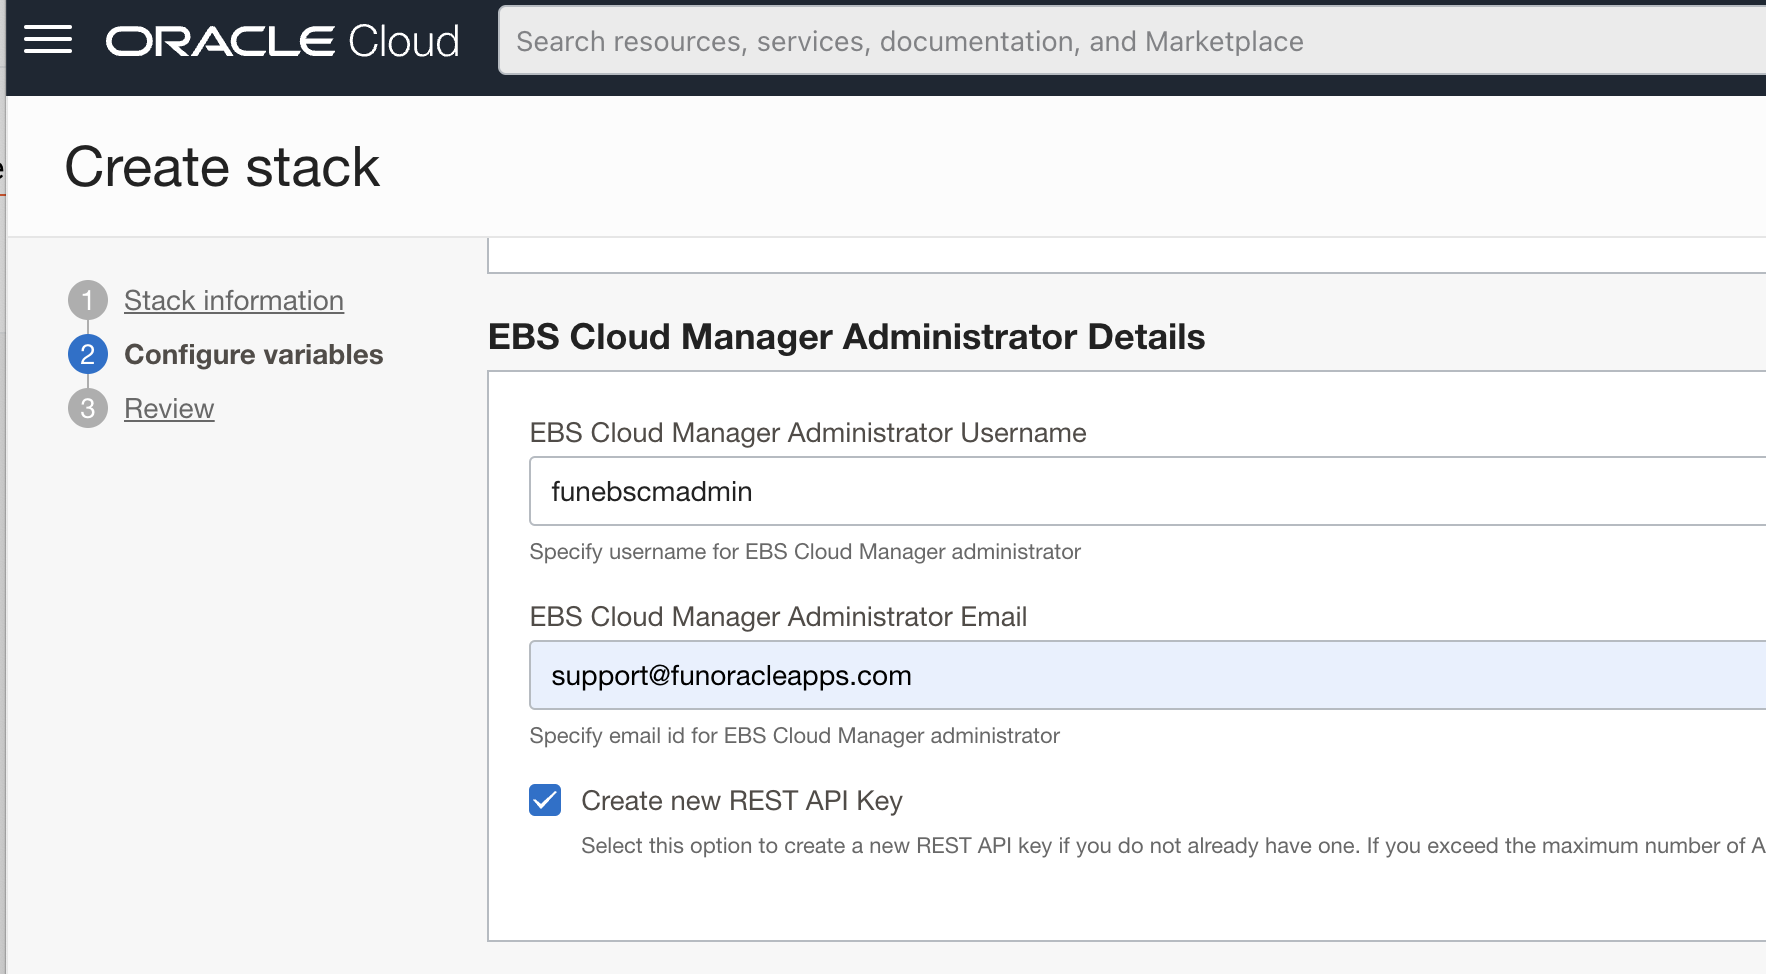
Under EBS Cloud Administrator Details:
Enter the user name corresponding to the EBS Cloud Administrator funebsadmin
Make sure the Create new REST API Key check box is selected.

Under EBS Cloud Manager Instance Details:
- Enter the web entry fully qualified domain name you entered that corresponds to the Cloud-Manager-web-entry element funebscm.training
- Select VM.Standard.E2.2 for EBS Cloud Manager Shape.
- Enter a password which matches the following criteria: 8 to 30 characters, at least one lowercase character, one uppercase character, one special character from _#$(Ora#0ds1das).
- Enter the contents of a public key file that will be used to connect using SSH to your Oracle E-Business Suite Cloud Manager Compute instance. For more details on how to generate the key, see Creating a Key Pair in the Oracle Cloud Infrastructure Documentation.
- Choose the availability domain that ends in -1 from the list under EBS Cloud Manager Availability Domain.


ssh-keygen -b 2048 -t rsa
Under EBS Cloud Manager Network Details:
Leave the Custom CIDR Ranges check box deselected.
Enter a CIDR block that corresponds to the IP range of the clients you plan to use to connect to Oracle E-Business Suite Cloud Manager. For the whole internet, use 0.0.0.0/0.

Enter the values corresponding to Client ID, Client Secret, and IDCS Client Tenant .

On the Review screen, verify the information and click Create.

This takes you to the Stack Details page for your newly created stack. On this page, click the Terraform Actions drop-down list and select Apply.
In the Apply dialog window, leave the default settings as-is and click Apply.
On the Job Details page, you will see the job status which will cycle through Accepted, In Progress, and Succeeded. After the job succeeds, you will have all the network resources (VCN, load balancer, subnets, and so on) required to deploy the Oracle E-Business Suite Cloud Manager Compute instance.

On the Application Information tab are details related to the Oracle E-Business Suite Cloud Manager instance and load balancer.
Make a note of the Private IP, Public IP, Login URL, and LB Public IP. These variables are needed for the remainder of the procedures in this section.


Post a Comment
Post a Comment